
Interactives
On this page you’ll find interactives I’ve made that let students explore various concepts. Most of them were made to go along with a particular story I wrote, but they can be used on their own.
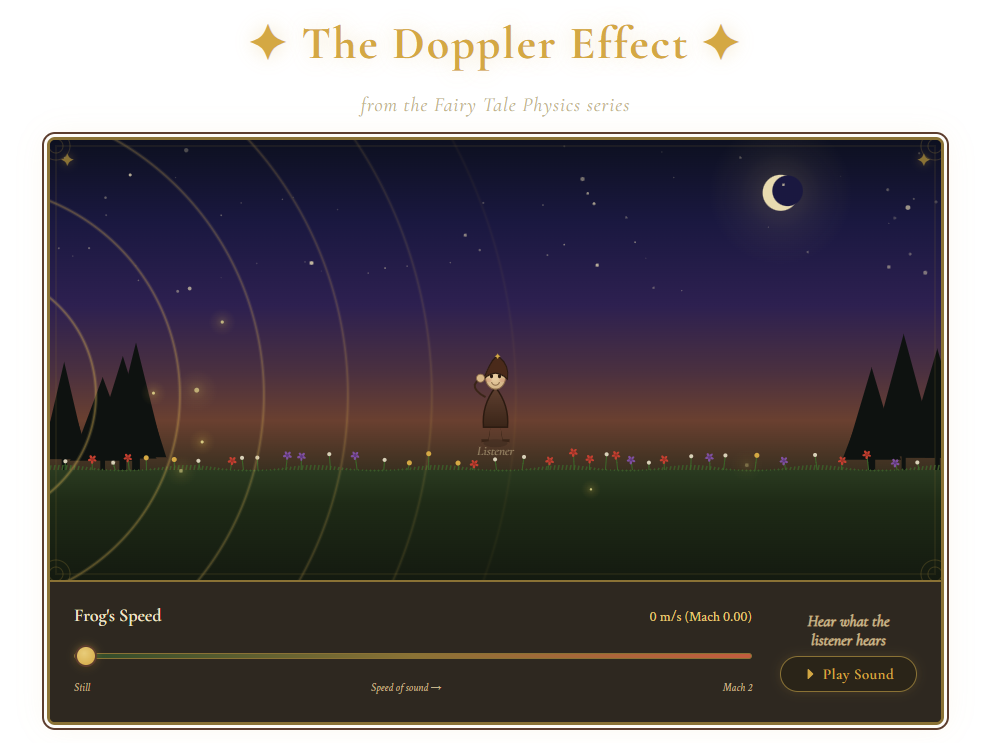
The Doppler Effect!
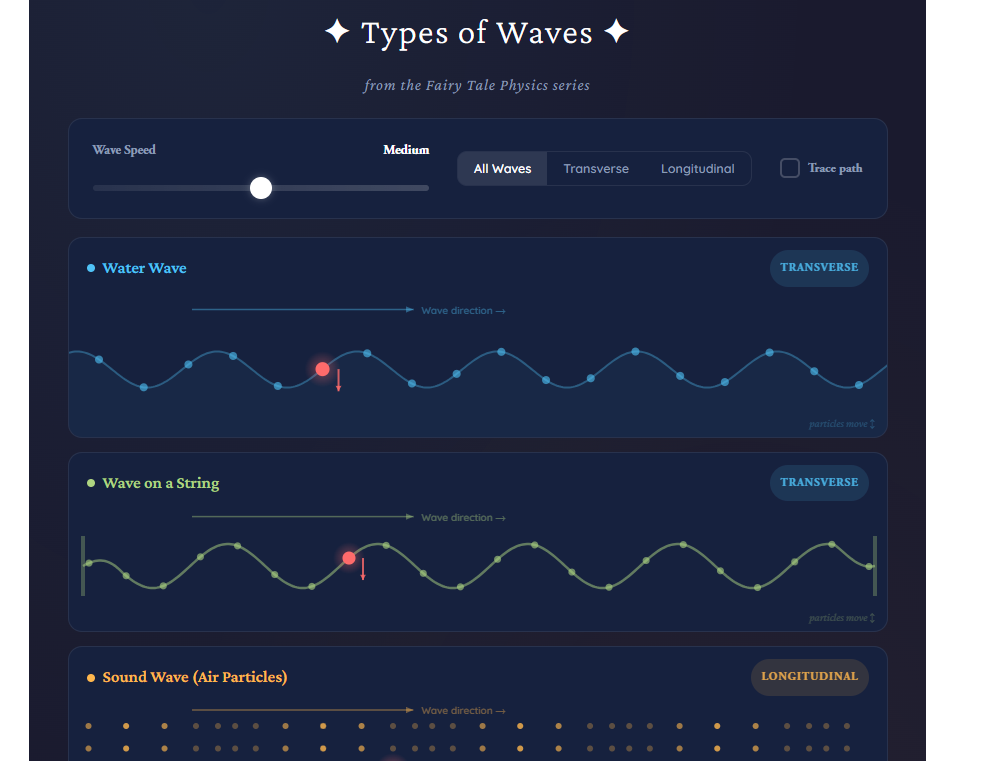
Types of Waves
The Doppler’s Words
